*PicMonkey affiliate links used in this post. See full note below.
Today, I'm writing to all of you who don't yet edit your personal photos. (You know who you are.) Maybe you're intimidated by all of the photo editing options or not ready to commit time to such an endeavor. Maybe you like the photos your handy lil' point-and-shoot (or iPhone) captures and don't see a need to improve on an already good thing. Whatever your reasons, set them aside for a few minutes--just long enough to imagine a way for beginners like you and me to have family photos that we're proud of.
It's possible! Today, I'll show you how with PicMonkey. It's one of my favorite free photo editing options.
See a few other free photo editing options >> here.
Really, if I can do it, then you can too!
Why edit family photos?
First, let's touch on a pretty important question: Why do we need to edit our photos anyway? Aren't digital cameras able to capture photos in all of their full-color, well-lit glory? Shouldn't photo editing be left to the pros?
Short answer: No.
Point-and-Shoot (P&S) cameras are often used on some sort of auto or preset mode that only guesses on your photo-taking needs, sometimes (often) leading to a washed-out or dark or otherwise imperfect photo. Editing your favorite photos before printing also assures that you're displaying and preserving quality images. Getting into the habit of editing helps zero in on showcasing just the best photos, freeing your energies of the hundreds (even thousands) we can end up with in a year. Even if you're not convinced to edit all of the photos you decide to keep, then maybe you'll choose to edit at least those that are sent in cards, printed in a photo book, or enlarged to display in your home.
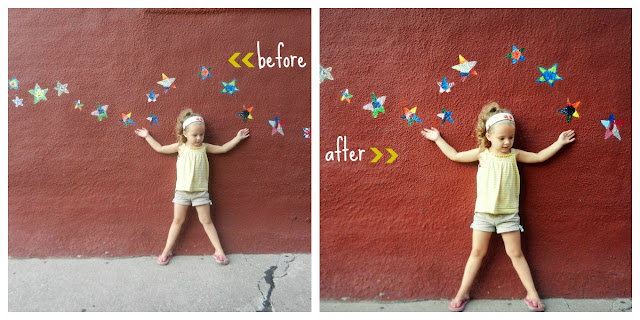
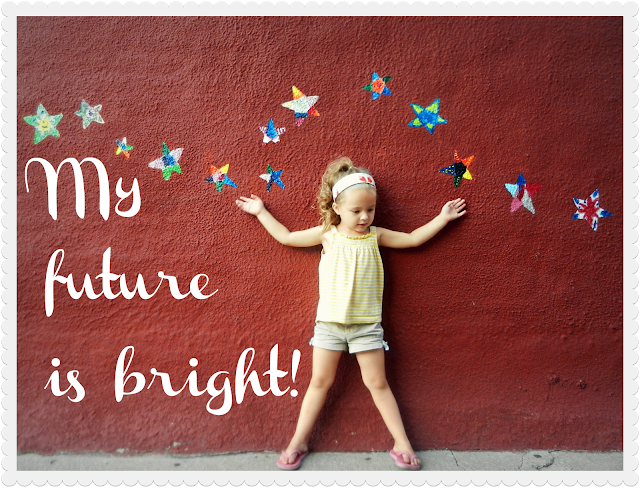
In the example above, the "before" photo could easily be accepted as an okay addition to our family photos--because I'm not a photographer. However, with a little editing love from PicMonkey, the "after" is something I'm a little more excited to print and keep as a cherished memory.
Photo Editing for the Beginner with PicMonkey
I've highlighted several free photo editing options perfect for the average person's daily photos. My favorite is PicMonkey, so I'll talk about photo editing using this option. Although, other photo editing options often have similar editing options and features.
You don't need an account to upload a photo and use the free features. There are plenty to keep you busy! PicMonkey now has some features available through a Royale account. I fell in love with them. If you're just beginning, start with the free options and see what you think.
1. Choose a photo to edit.
I know, we're starting out really elementary here. But this is an important step. It's easy to take a hundred photos just in one afternoon, and they will not all be edited or even kept. I usually start with viewing the photos on my computer while they're still on the SD (photo memory) card. I delete any that are blurred, eyes closed (or, worse, half-closed), or otherwise not worth keeping. If I took a bunch of photos of, say, Ian walking down the sidewalk, then I usually select the best 1-3 and delete the others. Or if several photos didn't turn out how I hoped, I just delete them all. (With the hundreds of good photos we have, this is not a loss!)
Once I do a quick purging, I then copy the photos over to my computer in the appropriate folder (I organize my photos by year, then by season--spring, summer, fall, winter). Now, I can go to PicMonkey.com and start editing. I start with uploading one of my favorite photos from the day/week/event, and continue choosing my favorites to edit. Then, if I get tired or have to quit editing for some reason, I have at least a couple great photos edited and ready to share on Facebook or print, or whatever else I hope to do with them.
2. Edit the basics.
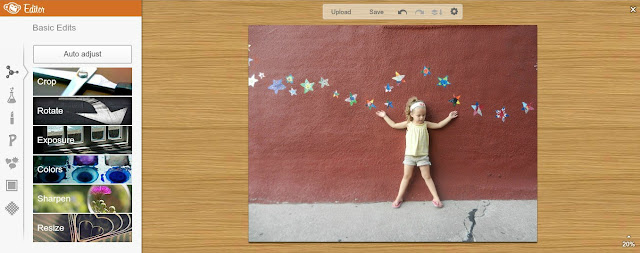
Basic editing includes things like exposure (brightness, contrast), colors (saturation, temperature), and cropping. These are the things that will (hopefully) improve the photo and make it better for printing and displaying. If you want to do the minimum editing on your photos, I would start and end here. Keep reading to see how I edited my photo with the basics.
Crop photo.
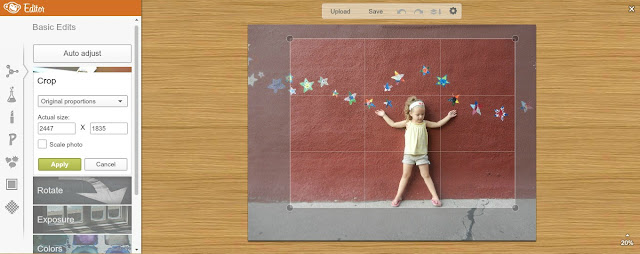
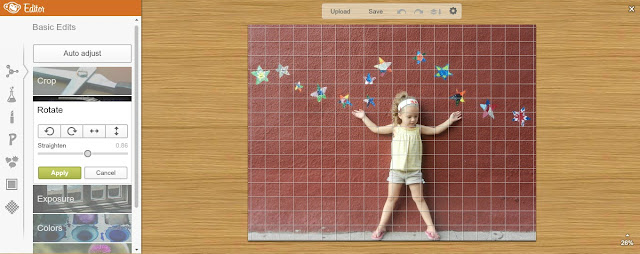
I used to think I could capture a photo and just crop it later, but that can alter the image's quality, so I'm learning to frame a photo how I want it. But sometimes cropping is necessary--either a little to cut out the edge of something in the corner of the photo, or a lot to better frame the photo and put the subject back in focus, like my photo above. There's too much background going on in this photo, and the edges aren't processed right and are distracting, so I cropped them out. I most often use "original proportions" when cropping so that it can easily be printed or used like my other photos.Rotate photo.
Sometimes I'm a little off when holding the camera and the photo needs to be straightened a bit.Adjust photo's exposure.
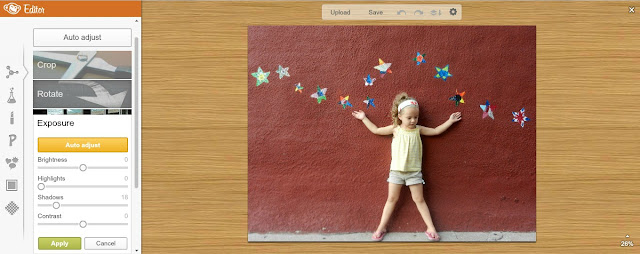
I usually start with the "auto adjust" button on exposure. If I like the improvements, then I can tweak them a bit or just apply the changes. Sometimes, PicMonkey gets really off on the exposure or thinks that nothing needs to be changed, then I can manually play with the options to find something that works. Highlights and shadows often adds the light and definition I'm looking for without over-exposing the photo.Adjust photo's color.
I also "auto adjust" the color just to see what it does. This usually reads my photos as too warm and sends it way over into the cool/blue side of things (like it did in the photo above). I'll end up cooling them slightly or not at all, depending on what the photo looks like. If there's white in the photo, I'll adjust the temperature until the object looks closer to white. Otherwise, I like my photos to be warmer. I ended up not changing the color in this photo.Sharpen image.
I generally don't sharpen my photos because it can cause a mediocre photo look really bad. If the photo was taken in really good natural light, then it can probably be sharpened a bit if needed without making the photo worse.Auto adjust photo.
PicMonkey has an "Auto Adjust" option that attempts to fix exposure and color all in one click (like above). I usually start with this, then decide if I should undo it or make minor adjustments. It isn't always real accurate, so sometimes I prefer to "Auto Adjust" exposure and color separately so that I can see the changes and fix them as necessary.3. Touch up photo.
This is where you can remove red eye, cover up blemishes, and even whiten teeth. I generally don't use these features, mainly because my pictures are predominantly of my kids and they're already perfect. (Seriously.) It's best on close-up photos when blemishes are obvious (i.e., a large cheesy grin that's looking a little too yellow). Free photo editing is pretty basic and can quickly make a person look goofy if not done right. If you do choose to, say, add a tan or tint lips, just go light so it blends in and looks natural.
4. Add photo effects.
This last part can be a lot of fun, but can also quickly get out of control. Photo effects make a photo look retro, or dark around the edges, or enhance colors. If the photo is meant to be online or is of an object, then heavy effects can be more playful (a la Instagram). However, if the photo is meant to be displayed or printed for a photo album, go light on the effects so the photo prints well and still looks good after the trend of over-edited photos has passed.
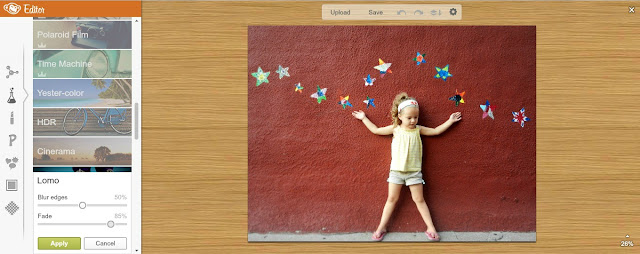
Effects can be layered, or used by themselves. They can be applied full force (not recommended) or faded. Once you play with them a bit and try out a few, it's a good idea to settle into your favorites. This will simplify editing, and keep your photos looking cohesive when you print them for an album or post them on Facebook.
Starting with Picnic, I settled into using a Lomoish / Cross Process combination. Now with PicMonkey, I tend to use Intrepid faded between 75 and 90% (or Lomo faded to about 85 or 90% if I want to enhance the colors), then sometimes Polaroid Film to 85 to 90%. There's no rhyme or reason, that's just a combination I've stumbled into that I like.
5. Add frames, overlays, text, or other extras, if appropriate.
Other editing options include text, overlays (or clipart), frames and textures. These can be a lot of fun to play with, but really aren't necessary in everyday photo editing. They enhance images in a blog post, but in my opinion they aren't really appropriate for photos to be printed or preserved as family photos.
Photo is edited and ready to post on the blog, share on Facebook, print, and preserve!
Note for beginners: Get the playing out of your system before going crazy editing all of your photos. I realize now that I went a little overboard on some of the first photos I edited. Tastes in photo editing can change, so try to keep that in mind as you settle into the editing features that work for you. Also keep the photo looking natural and true to life, especially if people are in it.
Your turn: Edit a photo, then tell share your favorite photo editing effects.
also read:
beginner point-and-shoot photography tips
how to make your own watermark
browse all my picmonkey tutorials
*Note: PicMonkey affiliate links used in this post. This post was written long before I became a proud PicMonkey affiliate. Now any purchases made through one of these links will earn me a small commission at no extra cost to you. If you find these posts helpful and upgrade to Royale, please consider using one of the links above to do so. I then donate a portion of all my proceeds. Thank you.

